Camping solar panels are a game-changer for anyone who enjoys spending time off the grid. Whether you’re in a tent, camper van, or RV, having a reliable solar setup can keep your devices charged, your lights on, and even power small appliances. Unlike traditional fuel-powered generators, solar panels are quiet, portable, and environmentally friendly. Many campers underestimate the importance of properly setting up their solar panels. Incorrect positioning, poor connections, or overloading batteries can lead to low efficiency or even damage your system. Understanding the basics of solar power, the components required, and the best practices for setup ensures that your camping experience is safe and hassle-free. This guide will walk you through everything you need to know to set up camping solar panels correctly. From selecting the right gear to positioning panels for optimal sunlight, monitoring power, and avoiding common mistakes, you will learn the steps that make solar energy work for you in the outdoors. With careful planning and simple adjustments, your solar panels will provide dependable power wherever your adventure takes you.
Why Use Solar Panels for Camping?
Benefits of Solar Power on the Trail
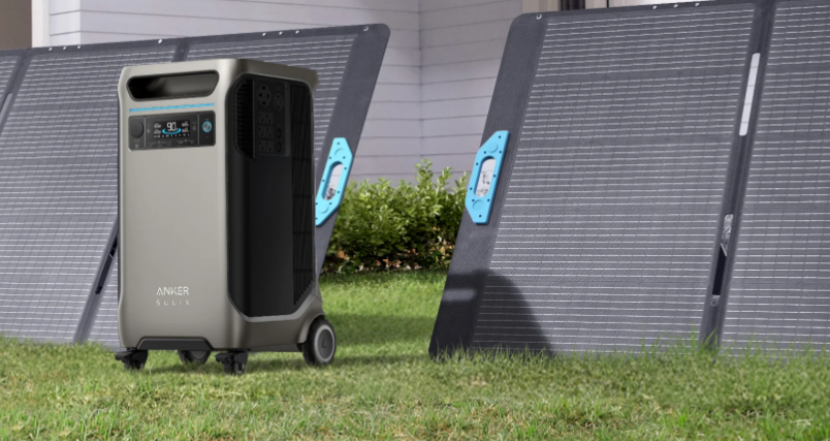
Solar panels provide clean energy, allowing you to stay off-grid for longer periods. You won’t need to rely on disposable batteries or noisy generators. They are portable, lightweight, and quiet, making them perfect for camping. Modern solar panels are designed to withstand the elements and can be folded or carried easily. Solar energy also reduces your environmental footprint. Unlike fossil-fuel-powered generators, solar panels produce no emissions and make minimal noise, helping preserve the natural camping environment.
Typical Power Needs for Campers
Before setting up your solar panels, it’s important to estimate your power needs. Common devices campers use include phones, tablets, LED lights, small fans, portable refrigerators, and GPS units. A small solar panel setup can handle charging devices, while a larger setup may power more energy-demanding appliances like mini fridges. Knowing your power requirements helps you choose the correct panel size, battery capacity, and charge controller. This ensures your camping solar panels can supply enough energy throughout your trip, keeping devices running without interruptions.
What Gear You Need Before Setup
Choosing the Right Solar Panels
Selecting the right solar panels is the first step to a successful setup. Look for panels that match your power needs and travel style. Flexible panels are lightweight and easy to carry, while rigid panels often offer higher efficiency and durability. Panel wattage determines how fast your system can generate energy, so calculate your daily energy consumption and choose panels accordingly.
Batteries, Charge Controllers, and Accessories
A good battery is essential for storing the energy your solar panels produce. Pair it with a charge controller to protect your battery from overcharging and prolong its life. There are two main types of controllers: PWM and MPPT. MPPT controllers are more efficient and can extract more energy from your panels in less-than-ideal sunlight conditions. Accessories like cables, connectors, and fuses are also necessary to complete the system safely. Don’t forget safety gear such as gloves and insulated tools when handling electrical connections.
Cables, Mounts, and Safety Gear
Proper cabling and secure mounting ensure that panels stay in place and operate safely. Use weather-resistant cables and connectors to prevent shorts or corrosion. Mounts and stands allow you to adjust the angle of the panels for maximum sun exposure. Safety is critical: double-check connections and avoid placing panels in unstable locations.
How Do You Set Up Camping Solar Panels Step by Step?
Step 1 — Find the Best Spot and Angle
Position your panels in a location that receives the most sunlight. Avoid shaded areas from trees or tents. If possible, tilt panels toward the sun to maximize efficiency. Morning and late afternoon sun angles differ, so adjust as needed throughout the day.
Step 2 — Connect Panels to Controller and Battery
Connect your panels to the charge controller first, then to the battery. Follow the polarity markings carefully: red for positive and black for negative. This prevents short circuits and protects your battery. Ensure all connections are tight and secure.
Step 3 — Secure and Stabilize Your Panels
Once connected, make sure the panels are stable. Use stands, mounts, or stakes to prevent movement in wind or uneven terrain. If panels are lying flat, check regularly for dirt, leaves, or snow that can block sunlight.
Step 4 — Start Charging and Monitor Output
Turn on the system and monitor the battery and panel output. Many setups have indicators or apps to check voltage and current. Ensure the battery isn’t overcharged and energy is being stored efficiently. Monitor power consumption and adjust usage if necessary.
Tips for Keeping Your Solar Setup Efficient
Avoid Shade and Re-angle Throughout the Day
Shadows drastically reduce power output. Move panels or adjust tilt to follow the sun. Even a few degrees of adjustment can improve efficiency.
Clean and Maintain Panels Regularly
Dust, dirt, and debris reduce solar performance. Clean panels with a soft cloth and water. Avoid abrasive cleaners that can scratch the surface.
Monitor Power Use and Storage
Keep track of how much energy your devices consume. Avoid draining the battery completely, which can shorten its lifespan. Use energy-efficient devices and LED lights whenever possible.
Common Mistakes and How to Avoid Them
Many campers make the mistake of misjudging their power needs, often underestimating the total watt-hours required for all devices. To avoid running out of power, it’s essential to calculate the energy consumption of each item beforehand. Additionally, wrong panel placement can drastically reduce efficiency—shadows from trees, tents, or vehicles can block sunlight. Always test different spots before finalizing the panel position. Lastly, ignoring battery protection and ventilation can lead to serious damage. Overcharging, overheating, or poor airflow can shorten battery life, so ensure you use a proper charge controller and place your battery in a cool, well-ventilated area. By addressing these common mistakes, you can maximize the efficiency and longevity of your camping solar panels.
Conclusion
Setting up camping solar panels correctly ensures you have reliable power for all your outdoor adventures. By selecting the right panels, batteries, and accessories, positioning them properly, and following step-by-step installation, you can enjoy uninterrupted electricity off the grid. Regular maintenance, monitoring power usage, and avoiding common mistakes further enhance efficiency and prolong the life of your system. Solar panels allow you to stay connected, keep lights and devices running, and reduce reliance on noisy generators. They are a clean, sustainable, and quiet solution for modern camping. With careful planning and proper setup, camping solar panels make off-grid living safer, easier, and more enjoyable. By following these guidelines, you’ll maximize energy production, protect your equipment, and focus on enjoying the outdoors—without worrying about power shortages or unexpected technical issues. Whether it’s a weekend in the woods or an extended adventure, your camping solar panels will provide peace of mind and reliable energy wherever you go.